 Does one size fit all?
Yes...and no. It depends on your image.
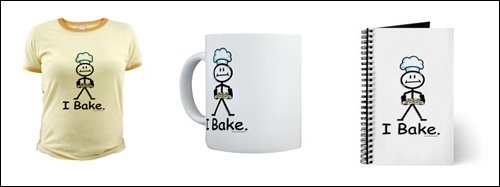
For BusyBodies none of my images have a background so I don't need to worry about full bleed. And if you don't need to worry about full bleed, you can get away with creating one image, one size and use it for many CafePress products. All of my BusyBodies character designs are one size and I've fit them on many products without having to do many versions of the same art.
Create your artwork
First I create my stick person in Illustrator CS2 (Creative Suite 2 for Mac OSX). I then copy and paste it into an 8"x10" Photoshop document that's 300dpi (300 dots per inch resolution), RGB (Red, Green, Blue...it's a color format). When I'm finished adding shadows and other final touches I flatten the image and save it as a PNG (Portable Network Graphic file format).
Go to your media basket
Now I have a nice 8"x10" high resolution image I can upload to my CafePress image basket and apply to products. I then sign into my CafePress account, click on "media basket," click on "images," then go to the appropriate folder (I have my images organized in folders), then click on the orange button: "upload new image."
Upload your image
From there I upload my image, tag it for key words that best describe my image (so that it's findable in the CafePress marketplace), categorize it (also for the marketplace) and go back to my "your account" page. Now I go to the shop management section and click on the sections/products link to add a new section to wherever I want a new section (design) in my shop.
Add products with your new image
Now here's where you can add products a number of ways.
I like to ignore the two options first given to you and just click on the tab that reads, "Section Contents." It will say "New Section is currently empty." You can click the orange button "Add a product" and go through the CafePress products and compile a list of products you'd like to add all on one page (it's pretty self explanitory when you get there). You then will have to click on "select image" (below that empty box that says "No Product Image"). This takes you to your media basket where you can select your image. In this case, it's my 8"x10" stick figure.
Once you have your list of products and an image selected you click the big button on the bottom of the page that says "Add These Products."
Resize your image to fit on several products
Now you have a bunch of products in your new section with the same image on all of them. The 8"x10" image will look good on most of the shirts, however it will look too large on buttons, magnets, coasters and some other products. Now you just have to click on each product and resize the image height so that it appears smaller and fits better on your products. Remember that greeting cards, oval stickers and rectangle magnets can be turned horizontal or vertical too. Now here is where having your image at 300dpi comes in handy...it will also look good blown up on a poster or print since the resolution was set high.
Plan ahead to save time later
Once you get a nice section built, if you plan on making future designs the same size, you can import whole sections with image sizes set in place to save a lot of time.